Although my Nomadulino v01 foam kayak (extruded polystyrene based) is unsinkable, and I row in calm inland waters, there is still some collection of water dripping into the boat from the paddles, or there might be some coming in from waves when rowing in wind and waves on open water.
Sit on top kayaks tend to have open scupper holes which allow water to drain. But these often let in more water than necessary when rowing fast or over waves. So many people tend to plug these big open holes, pulling the plugs when necessary.
There are scupper plugs with one way valves, but these tend to be quite expensive.
Having started the build of Nomadulino v02, with shorter length, less height of the sides, and different form of the keels, I was again thinking about self draining scuppers with one way valves. And as usual you suddenly find two different solutions, both of which are cheap to very cheap.
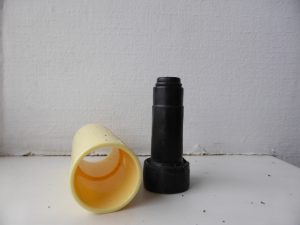
Version 1 using an existing flow stop valve and 3/4 PVC pipe
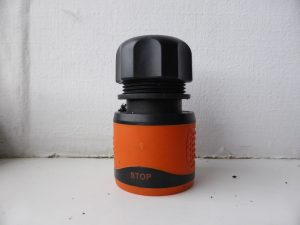
Version 1 uses an off the shelf Black & Decker garden hose set, consisting of a hose connector with and one without a flow stop valve, a spray nozzle, and the nozzle for the faucet. I found these for about 2 Euro’s per set at Action. At that price, although it is a bit of a shame, it doesn’t hurt to recycle three of the parts of the set into a plastic bin as I-m only interested in the flow-stop connector.
The other parts needed for this scupper are:
- Connectors for 3/4 PVC pipe
- A section of 3/4 PVC pipe, the well known off-white / slightly yellow pipe used for electrical wiring,
- Some glue for PVC.
The only tool needed is either a Dremel tool with cutting disk, and with a small round sanding attachment, or a small fine toothed saw and some sandpaper.
There are only a few steps to convert the flow-stop connector to a scupper with one way valve:
- Cut through the orange ring of the hose connector mechanism and remove the nut like bit used for tightening the connector onto a hose.
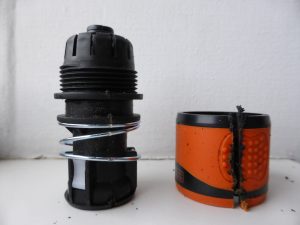
- Remove the ring and the underlying spring.
- Cut through the outer wall of the threaded section, only removing the outer part, leaving the section which normally would be pushed into a hose intact.
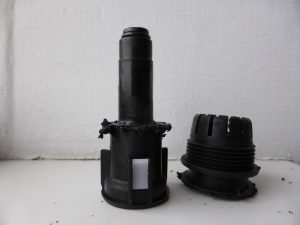
Cut off hose locking section with Dremel tool, leaving internal part intact - Cut through the connector section just below the locking latches / just above the stop flow mechanism in it’s closed position.
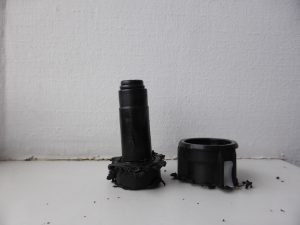
- Sand down the thickest part of the remaining valve mechanism, test fitting it in the PVC pipe connector. The intent is to get it to a size where it can be pushed into the PVC pipe connector with a snug fit but not requiring very high pressure to insert it.
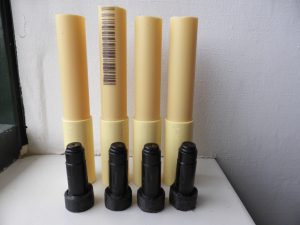
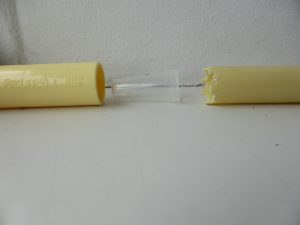
- Cut a length of PVC pipe sufficient to got through the full hull thickness (and a few mm as it will be easier to sand down an extruding bit to fit perfectly with the hull than to get a too short tube to fit) based on half the length of the connector and the length of the piece of pipe. In my case the combined length needed to be 12 cm, so the section of pipe was somewhere between 8 and 9 cm.
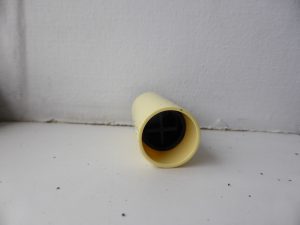
- Glue the piece of pipe into the pipe connector and let it dry. This is your scupper tube.
- Push the one way valve into the pipe connector end of the scupper tube.
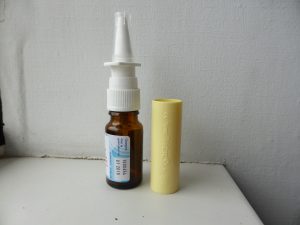
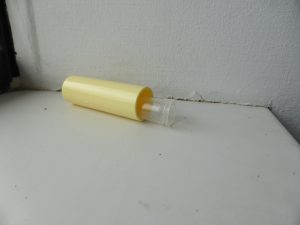
Version 2 using a nose spray bottle cap and 5/8 PVC pipe
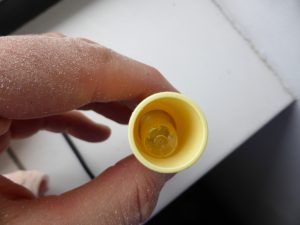
This version uses the transparent cap of a nose spray bottle as the valve. By pure chance I noticed that this valve does not fit into 5/8 PVC pipe but fits very loosely into the 5/8 pipe connector up to the rim in the center of the connector. So as long as the cap has some room to drop down from the rim and the end of the pipe glued into the connector is serrated to allow flow past the sides of the cap, the cap can work as a valve.
This version only requires something to cut PVC pipe with (Dremel tool with cutting disk, fine toothed small saw, or even just a knife.
There are just a few steps:
- Cut a section of PVC pipe so that half the length of the pipe connector and the length of the pipe will cover the thickness of the boat.
- Cut some serrations into the end of the pipe which will be glued into the pipe connector.
- Drop the nose spray bottle cap into the PVC pipe connector. The pointed end of the cap should be pointing up in the final device, down when dropping it into the connector (as you’re working upside down so to speak).
- Push the PVC pipe into the same end of the PVC pipe connector into which you dropped the cap. Push it fully in, and then pull it back about half a cm. Mark that position on the PVC pipe.
- Carefully glue the serrated end of the PVC pipe into the pipe connect up to the mark you made. Avoid having too much glue near the serrated end as it might affect the cap. Let the glue dry, keeping the device upside down.
Once dry you can turn the device over and test it. Blowing through it from the top (the pipe connector end, there should be little resistance. Blowing from the bottom the valve should close and there should be significant resistance. And yes, you could use it this way to help blow up balloons for a party.
Actual use
So far I’ve only tested these valves in the sink. Neither version is completely watertight. There is a very limited back flow of water, but in practice this will not be an issue as they will stop water splashing up through the scupper, will drain the few drops back down before any accumulation. The flow rates through both valves are limited by the diameter of the pipes used, and the reduction thereof by the valve mechanism. If the boat would be totally flooded, that rate, even with four valves, would probably require quite a bit of time to fully drain the boat. But for keeping a boat dry when there is just some splashing water coming over or some rain dropping in, this flow is more than sufficient.
For my boat it will be a matter of Epoxying the scupper tube into an appropriately sized hole through the boat, making sure that there is a sufficient layer of epoxy around the full length of the tube to prevent any water leakage.
For the flow stop connector based one way scupper directly gluing in place will be fine as the valve itself can be pushed out and replaced.
With version 2, I may opt to wrap the tube in some plastic foil to create a form fitting epoxy tube around the scupper valve tube, allowing the whole scupper tube and valve to be replaced.
If you do need much higher flow rates, you may need to go for a either a valve created from a wide bore tube and ping pong ball, or a wide bore tube and a reasonably large valve made from a rubber flap.